Can a torn jacket be repaired at home?
Just because your jacket’s ripped or torn doesn’t mean it’s done for. Got a favorite denim jacket with a ripped sleeve? A puffer coat with a torn seam? Or maybe a nylon windbreaker with a gash? Don’t worry, a lot of these common jacket problems can actually be fixed. You just need the right know-how and some patience. This guide will show you the key steps to fix all sorts of jackets. We’ll start by checking out the damage and picking the best way to fix it. Then, we’ll get into making solid repairs for things like fabric rips, busted seams, and leaks in the insulation. You’ll learn hands-on fixes like patching, darning, and sealing seams. This way, you can keep your go-to coat going strong for longer and cut down on waste. It turns a super annoying jacket problem into a win you did yourself.
Here’s what we’ll cover:
- First, check the damage and get your tools ready.
- How to fix fabric rips and holes.
- Dealing with seam failures and zipper issues.
- Special fixes for technical outerwear like rain jackets.
- Adding the finishing touches and looking after your repair.
- Knowing when to call in a pro.
- FAQ: Your common jacket repair questions answered.
You gotta figure out what kind of tear you’re dealing with and what your jacket is made of.
Here’s the main job: take a good look at the jacket’s fabric and the rip itself.
Don’t just dive in with a needle and thread. First, inspect the tear closely. Is it a neat slice, a ragged rip, or a seam that’s popped open?
The type of fabric really matters. Stuff like cotton, denim, or nylon is easy—you can sew it or use an iron-on patch. But for technical gear like Gore-Tex or thin shells, you’ll usually need special glue or repair tape.
If it’s a down jacket or one with synthetic insulation, a hole means the stuffing can leak out. Fixing it is a two-part job: first patch the outside, then make sure the insulation stays put.
Maria Chen, who’s an expert at fixing fabrics, says getting it right from the start stops a small problem from turning into a huge mess. Always peek at the care label first.
It’ll tell you what the jacket’s made of and if any cleaning rules could mess up your glue or patches. Knowing this stuff right away means you’ll pick the best and longest-lasting way to fix your torn down jacket.
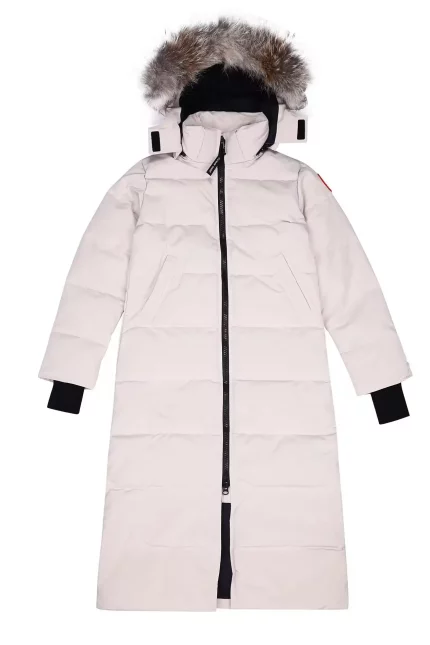
This vibrant pink mid-length parka delivers serious arctic protection for temperatures down to -30°C, featuring 85% white duck down with 600+ fill pow…
View Product →
What you’ll need in your jacket repair kit.
Your main task here is to put together a simple set of mending tools.
If you have the right tools ready, fixing your jacket will go way easier and look much better.
Your kit needs sharp fabric scissors, some pins, a seam ripper, and a few different needles—get a tough one for thick stuff like denim. Try to match the thread to the fabric.
Polyester thread is a great all-rounder—it’s strong and works on most jackets. Iron-on patches are perfect for a fast, solid fix on everyday jackets. For waterproof or technical gear, you’ll want special stuff like Tenacious Tape or Gear Aid patches.
Oh, and grab a thimble to save your fingers, plus find a clean, flat spot to work. When you’re repairing a torn down jacket, it helps to have a bit of the original stuffing—maybe saved from a seam—or some matching synthetic fill. That way, you can stuff any lost insulation back in before you close up the hole.
This high-quality replica vest utilizes 700-fill power white duck down to deliver a superior warmth-to-weight ratio
View Product →
Let’s talk about fixing rips and holes in fabric.
First up, how to patch woven fabrics.
The main idea is simple: use an iron-on or sewn patch to make it strong again.
Patching is the best way to go for holes in things like denim, canvas, or cotton jackets. Iron-on patches are quick and easy.
Just put the sticky side over the hole, cover it with parchment paper, then press down with a hot iron for about half a minute. If you want a fix that’s less noticeable or tougher, sewing a patch on is better.
Cut your patch from a similar fabric or something cool and different. Pin it behind the hole, then sew around the edges with a tight zigzag or straight stitch. I just fixed a favorite flannel jacket of mine.
I sewed a scrap of tartan fabric on the inside. It patched a big elbow tear and gave it a unique, personal look. The trick is to make sure your patch is at least an inch bigger than the hole all around. That gives it strength.
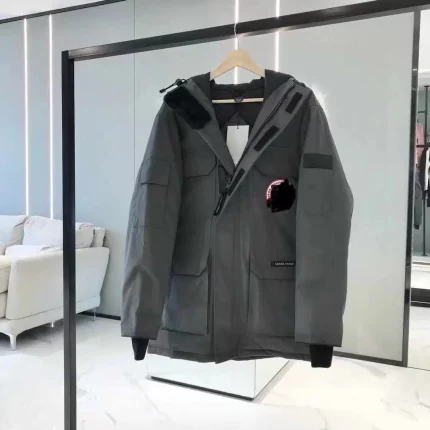
This distinctive sky blue mid-length parka provides serious arctic protection for temperatures down to -30°C, featuring 85% white duck down with 600+ …
View Product →
Now, for smaller tears and snags, you can try darning.
The basic move here is to weave thread back and forth across the tear to rebuild the fabric.
Darning is perfect for small tears, thin spots, or snags. It keeps the fabric looking and feeling like it did before.
Grab a darning needle and some thread that matches your jacket. First, make a base layer of stitches that run across the tear. Next, weave your thread the other way, through those base stitches. You’re basically copying the fabric’s own weave.
This is a common way to fix wool coats or sweater jackets. You’re aiming to make a strong web that closes the hole without any bulky patch. It takes a bit of patience.
but the fix is almost invisible from the outside. Just remember to keep your stitching tension even, so the fabric doesn’t pucker up.
Here’s a quick guide to picking the right fix for common jacket tears.
| What kind of tear is it? |
Best way to fix it |
Works best on these fabrics |
What you’ll need |
| A small hole, about the size of a pencil eraser |
Try hand darning. |
Great for wool, cotton, or flannel. |
You’ll need a darning needle and thread that matches. |
| A large rip or gash |
Go with a sewn or iron-on patch. |
Ideal for denim, canvas, or nylon. |
Grab some patch fabric, heavy-duty thread, and an iron. |
| A split seam |
Just re-stitch it. |
This works on all fabric types. |
Use a seam ripper, a sewing machine or needle, and thread. |
| A puncture in a waterproof shell |
Use special adhesive repair tape or a patch. |
Made for Gore-Tex, nylon, or polyester shells. |
Get some specialty repair tape and alcohol wipes. |
| A tear where insulation is leaking out |
Patch Insulation Top-up |
This happens with down or synthetic puffer jackets. |
You’ll need a patch, tweezers, and some spare insulation. |
This black replica vest delivers efficient core insulation with 700 Fill Power white duck down, offering a balanced loft-to-weight ratio ideal for tra…
View Product →
Let’s fix those split seams and broken zippers.
First up, let’s tackle split seams and weak spots.
The main fix is simple: just re-stitch it. You can use a backstitch by hand or a zigzag stitch on your machine.
Seams often split in high-stress areas. Think armholes, pockets, and shoulders—they get a lot of wear and tear.
Start by cleaning up the spot. Grab a seam ripper and gently pick out any loose or frayed threads. Then, line up the fabric edges just like they were before and pin them together. If you’re sewing by hand, go for a backstitch.
It’s super strong. Push your needle up, then down a little ahead, and come back up a stitch behind. Just keep repeating that. This makes one solid, tough line of stitching. On a machine, a narrow zigzag stitch works great.
Run it right over the old seam—it adds both stretch and strength. Here’s a pro tip: stitch a bit past the tear on each end. This keeps it from fraying again right away. Want to make it last even longer? Add a second line of stitches right next to the first one. It’ll buy your jacket extra years.
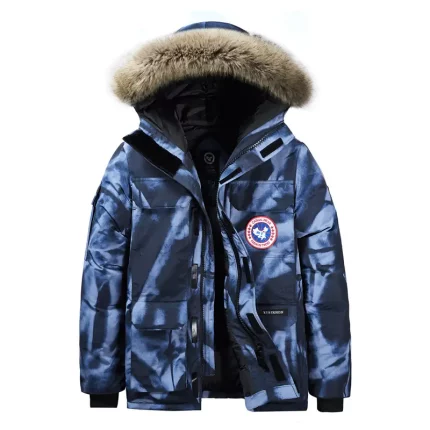
This rich royal blue mid-length parka delivers serious arctic protection for temperatures down to -30°C, featuring 85% white duck down with 600+ fill …
View Product →
Now, about those zipper problems.
The fix usually means swapping out the broken slider or putting in a whole new zipper.
A zipper that’s stuck or comes apart can totally ruin a good jacket. A lot of the time, the slider’s just worn out.
To replace it, you need a new slider that’s an exact match. Check the back of the old one for a size number, like a #5. Here’s how: use pliers to gently take off the little metal stop at the top. Slide the old slider off, pop the new one on.
Then, either crimp on a new metal stop or sew a few tight stitches to hold everything in place. But if the teeth themselves are messed up, you’ll have to replace the whole zipper. That means carefully taking the old zipper out.
Buy a new one that matches—get a separating zipper for the front and a closed-end one for pockets. Then, sew it back in using a zipper foot on your machine. It’s a bit of a detailed job, sure. But putting in a new main zipper can bring your favorite jacket right back to life.
>Engineered with 700-fill power white duck down, this high-quality replica vest delivers exceptional thermal efficiency for light cold conditions.
View Product →
Let’s talk about fixing high-tech outdoor jackets.
First up, patching up waterproof and breathable layers.
The main trick is to use special seam sealant and repair tapes made for these kinds of fabrics.
If you’ve got a tear in a Gore-Tex or similar jacket, you need the right stuff to keep it waterproof.
Don’t just grab any old glue or patch, because that can block up the tiny holes in the material. First, clean the spot really well with rubbing alcohol to get rid of any grease or grime.
Then, cut a piece of strong repair tape or a patch into a round shape—corners tend to lift up. Press it firmly over the tear and hold it down for about half a minute.
If the seam is leaking, just run a thin line of waterproof seam sealant right along the stitches that are letting water in. Let everything dry completely, usually for a day or two.
before you check if it worked. These fixes are tougher than you think and can get your pricey gear working like new again.
This vibrant bright red mid-length parka offers serious arctic protection for temperatures down to -30°C, featuring 85% white duck down with 600+ fill…
View Product →
Now, for fixing tears in puffy or insulated jackets.
Here, you have two jobs: keep the stuffing in and close up the hole outside.
A rip in your down or synthetic puffer jacket is tricky because you need to stop the filling from coming out and also patch the shell.
First, carefully tuck any loose filling back into its little fabric pocket. If you’ve lost some filling, you can use tweezers to poke a bit of new down or synthetic fill right back through the hole. Next, you need to seal up the outer layer.
For everyday puffer jackets, sewing a patch on tightly does the trick. For tougher, outdoor-grade shells, go for a repair tape that’s made to handle cold and stay flexible.
Put the tape on just like we talked about before, making sure it’s sealed all the way around. To stop more tears later on, you can even put some strong tape on spots that get a lot of wear, like cuffs and pocket corners, before they rip.
Here’s a quick look at different glues and tapes for fixing jackets.
| What it is |
Best for |
Biggest plus |
Things to know |
| Iron-On Glue (Webbing) |
Putting fabric patches on everyday jackets |
It’s fast and you don’t need to sew; works well on regular cloth |
Use a cloth when you iron it on; it might not stick to synthetic fabrics forever |
| Fabric Glue |
Fixing hems or holding patches for a little while |
Stays bendy when it dries; super easy for little jobs |
It’s not forever, especially on spots that get pulled a lot; be gentle when washing |
| Heavy-Duty Repair Tape (like Tenacious Tape) |
Waterproof jackets, tents, and sleeping bags |
Really tough, keeps water out, and stays stretchy |
The spot has to be totally clean and dry, or it won’t stick right |
| Sunlight-Activated Repair Patches |
Bike clothes and other outdoor gear |
They harden in the sun and get super strong |
You need to leave them in direct sun for a few hours to work properly |
Featuring high-loft 700-fill power white duck down, this versatile vest delivers premium thermal insulation for cool to cold conditions.
View Product →
Finishing Touches and Aftercare
Making Repairs Visibly Appealing
Here’s the main idea: make your repair look good by getting creative with it.
A fix doesn’t have to be ugly. Take *sashiko*, for example. It’s a Japanese method where you use basic running stitches to strengthen fabric.
It’s a really popular way to patch up tears with some style. Just grab some thread in a contrasting color. You can stitch cool geometric shapes right over the patch or the darned spot. Or, try a bit of embroidery on top of the patch.
It turns that old hole into a unique, custom detail. If you want it to blend in, find your patch fabric from a hidden part of the jacket. The inside of a pocket flap or the hem works great. That way, the color and texture match perfectly.
The final touch is key: give the mended spot a good press with your iron. Just use the right heat setting for the fabric. This locks the stitches in place and makes everything look neat and flat. A good visible repair isn’t just a fix—it adds personality and has its own story.
Washing and Maintaining a Repaired Jacket
The main goal here: take special care of it so your repair lasts.
Looking after your jacket after the fix is super important. Always let any glue or sealant dry completely before you wash it. That usually means waiting 48 to 72 hours.
When you do wash it, turn the jacket inside out. Use a gentle cycle and a mild detergent. Skip the fabric softener. It can break down glues and ruin waterproof finishes. Air drying is your safest bet. If you must use the dryer, keep it on a low heat.
Too much heat can melt the glue or make patches come loose. Got a taped repair on a technical jacket? Every now and then, treat the whole jacket with a DWR spray. That’s Durable Water Repellent. It helps keep it working like it should.
When you’re not wearing it, hang your mended jacket on a wide hanger. Don’t just stuff it in the closet. This keeps stress off the spot you fixed.
So, when should you call in the pros?
First, figure out if the damage is too tricky for a DIY fix.
The main thing is to ask yourself: can I really handle this repair myself?
Some rips and tears definitely need a professional’s touch. Think big tears in leather or suede, replacing a whole lining, or fixing fancy parts like detachable fur trims.
Lots of outdoor brands—Patagonia, The North Face, Arc’teryx—have their own repair shops. Sometimes you pay, sometimes it’s covered by the warranty. Check that warranty!
It often covers factory flaws, but for normal wear and tear, they might have a cheaper fix-it program. A worker at a local gear shop told me, We ship out tons of jackets for pro repairs every season. For pricey gear, it’s a smart move.
It keeps the waterproofing intact and the warranty valid. But if the repair bill gets close to half the price of a new jacket, think hard. Is the old one special enough to you to be worth it?
Okay, you’ve decided to go pro. Now, how do you find the right person?
The key is finding someone who knows your specific type of jacket.
Once you decide to get help, look for a real expert. For wool coats, denim, or basic seams, your neighborhood tailor is perfect.
For high-tech outdoor gear, you need the brand’s official repair spot or a shop that only fixes outdoor stuff. They’ve got the right fabrics and know-how. Before you mail it off, nail down the cost and how long it’ll take.
Ask them how they work: Do they use the same materials the factory does? Can they make the color match? What happens if the fix doesn’t hold up? Sending good, clear pictures of the tear first helps them give you a better price quote.
Going this route usually gives you the toughest and best-looking fix for really complicated repairs.
So, fixing a torn jacket yourself is a super useful skill. It saves you cash, cuts down on waste, and keeps your favorite pieces alive. Whether you use an iron-on patch, do some careful darning, or slap on special repair tape.
it all comes down to what your jacket is made of and what kind of tear it is. Take a good look at the damage, use the right tools, and take care of it afterward. You’ll end up with a repair that works great and might even look cool.
Just remember, you can’t fix everything yourself. Knowing when to hand it over to a pro is as key as knowing how to sew.
Ready to bring your favorite jacket back to life? Show off your best fix or your toughest repair job in the comments! Want the full scoop on fixing up old leather jackets? Click here for our next guide.
Got questions about fixing jackets? Here are some common ones.
Can you just use duct tape for a quick jacket fix?
Duct tape can work in a pinch. It’s good for a quick emergency fix to stop a tear from getting worse or to keep the insulation in. But don’t count on it forever. The sticky stuff breaks down over time.
It leaves a gross, gooey mess and might even ruin the fabric when you peel it off. For a repair that lasts, grab some special fabric tape or a patch. Do it as soon as you can.
What kind of thread should you use on a tough denim jacket?
Go for a heavy-duty thread. Polyester or topstitching thread is great. Something thick, like Tex 40 or even heavier, works best. Upholstery thread is another strong choice. Try to match the thread color.
And don’t forget a heavy-duty needle—a denim needle is perfect. It won’t snap when you’re pushing through all those thick layers.
How do you fix a little hole in a down jacket so the feathers don’t all fly out?
Move fast! You don’t want more down escaping. Carefully tuck any poking feathers back inside the baffle. Wipe the spot clean with some rubbing alcohol.
Next, cut a piece of clear, flexible repair tape—like Gear Aid Tenacious Tape—into a round shape and stick it on. Press down hard for about half a minute. That’ll seal the hole and keep the rest of the down right where it belongs.
Can you wash a jacket with an iron-on patch without wrecking it?
It should be fine, as long as you put the patch on right. To make it last, flip the jacket inside out before tossing it in the wash. Use cold water and the gentle cycle. Skip the strong detergents and fabric softeners.
It’s best to let it air dry. The high heat from a dryer can weaken the glue over time, especially if you do it a lot.